
Hollywood Bathroom Remodeling Hollywood and nearby cities
Curbless Shower Planning, From Subfloor to Drain
A curbless shower lets you walk straight in with no step, and it looks wonderful when done well. It also asks more of the floor, the drain and the waterproofing than a shower with a curb, so planning matters.
 Hollywood Bathroom Remodeling
Warm design. Clear planning.
Zero threshold showers
What curbless really means
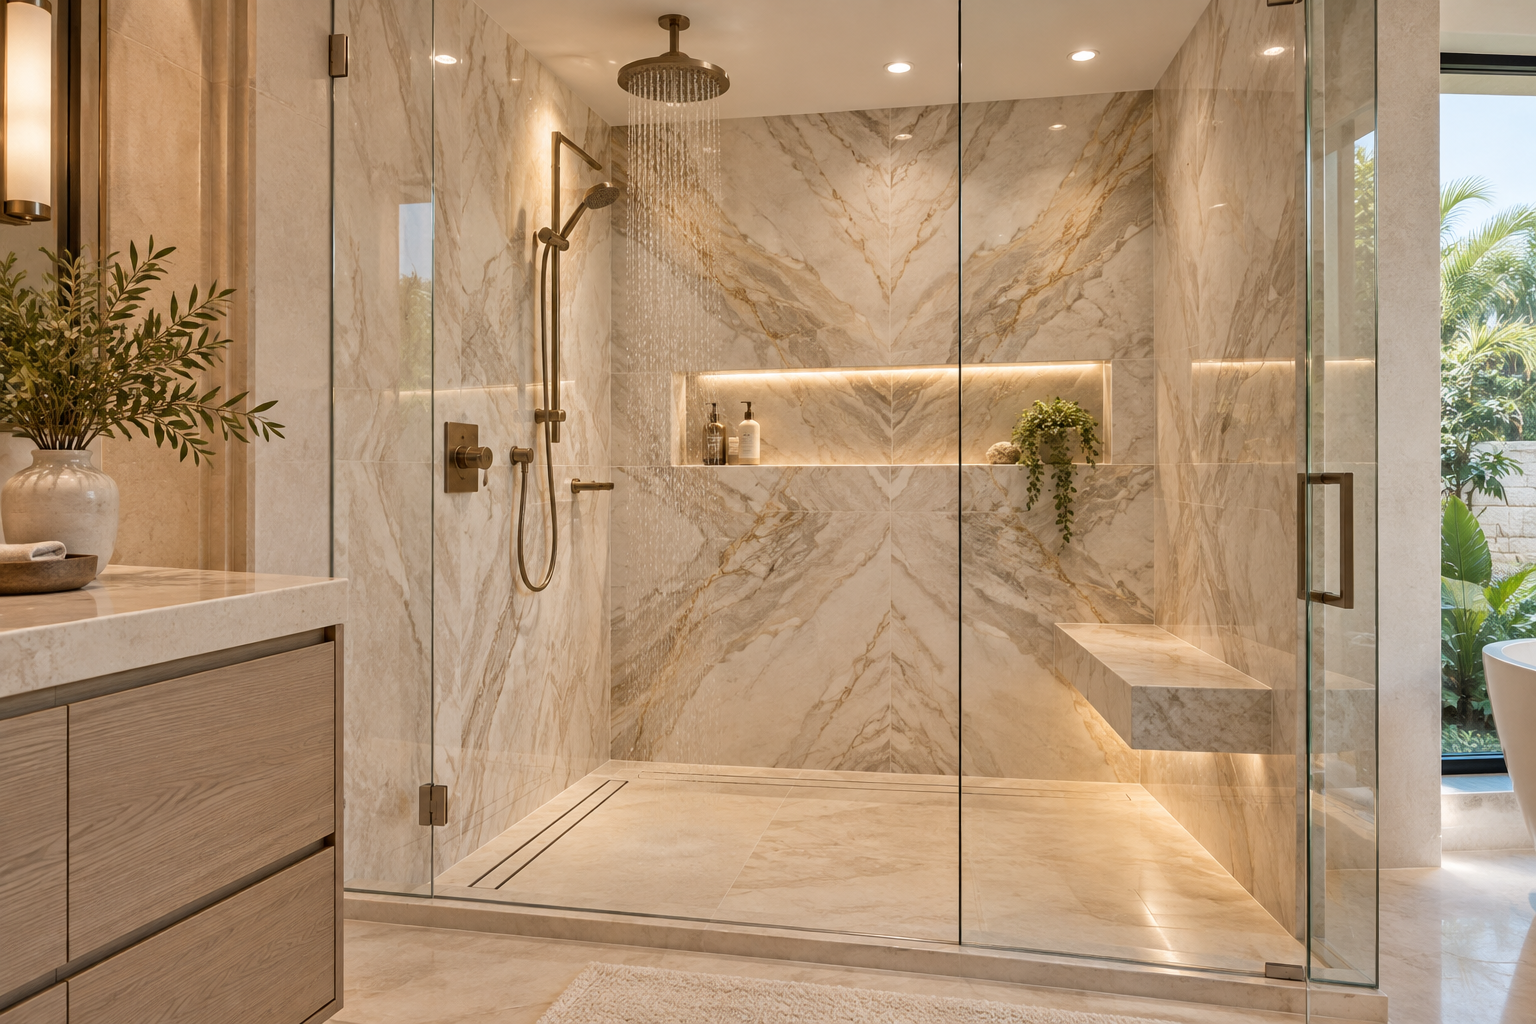
A curbless shower, sometimes called a zero threshold or level entry shower, is one where the bathroom floor flows into the shower floor without a raised edge. There is no curb to step over. Water is kept inside by the way the floor is sloped, by where the drain sits and by how the glass or curtain is arranged, not by a small wall around the base.
That sounds like a simple design change, but it affects almost every layer under your feet. The shower floor has to sit lower than the surrounding bathroom floor so that the slope toward the drain has room to work. In a shower with a curb, the tiled floor can rest on top of the existing subfloor with a pan built above it. In a curbless shower, the shower area is often recessed into the floor structure itself.
People choose this style for different reasons. Some want a clean, open look. Others want easier entry for a family member who finds steps difficult, or want a layout that will stay comfortable as years pass. Whatever the reason, the first conversation should be about what is under the floor, because that decides what is realistic.
It helps to separate the look from the engineering. The look is a flush, uninterrupted floor. The engineering is a slightly lowered structure, a carefully shaped surface and a sealed system that never lets water pass. When those two halves are planned together, the result feels effortless. When the look is chosen first and the engineering is figured out later, the project tends to run into trouble at the worst moment, with the old floor already torn open.
The slope problem in plain words
Every shower floor needs a gentle slope so water runs to the drain. In a curbless design that slope has to start at the room side and fall toward the drain without letting water escape across the threshold. The slope must be consistent and smooth. Too steep and it feels strange underfoot. Too flat and water pools. The right balance depends on the tile size, the drain type and the size of the shower.
Here is where the recess comes in. To fit the slope and the layers of waterproofing and mortar while still ending at the same height as the bathroom floor, the shower floor must start lower. Imagine pouring a gentle bowl into the floor, with its rim at the bathroom floor height and its lowest point at the drain. The bowl has to be deep enough for all the layers, yet shallow enough to feel flat.
This is why some bathrooms handle curbless showers easily and others do not. A home where the floor structure can be adjusted is very different from one where it cannot. For a deeper look at how slope and drains work together, read our page on shower drains and floor slope, which explains the geometry without making it complicated.
One more point about slope: the surface has to feel right, not only work on paper. Walk across a sloped floor barefoot and you notice even a small change in angle. A good installer checks the slope with a level during the work, adjusts the setting bed before it hardens and tests that water actually runs where intended. Homeowners can ask whether the floor will be flood tested before tile is set, which is a simple way to confirm the lower layers hold water and drain correctly.
What to check in the subfloor first
Before choosing tile or glass, someone needs to look at what sits under the bathroom floor. In a home with a wood framed floor, the joists, their direction and their depth determine how much a shower area can be lowered. Cutting or notching structural members is not a casual decision and needs professional judgment, sometimes involving added support.
In a home built on a concrete slab, lowering the shower means working with concrete. Some builds allow a section of slab to be removed and reformed. Others use a thinner build up and raise the bathroom floor slightly instead. Condos present their own questions: the floor may be a concrete slab shared with the unit below, there may be sound and fire protection layers, and your association may have rules about what can be altered.
Do not rely on guesswork here. A responsible remodeler will want to inspect the floor, ask about the building, and explain the options in plain words. You can also ask your city building department and your association what approvals apply. Requirements vary by city, building and community. Our condo bathroom remodel logistics page lists questions worth asking before work starts.
- Which direction do the floor joists run, and how deep are they?
- Is the floor wood framed or a concrete slab?
- Can the shower area be recessed without weakening anything?
- Does the building or association restrict changes to the floor?
- Is there a plumbing line in the way of the drain position?
Choosing the drain: point, linear or something else
The drain shapes the whole floor. A center point drain means the floor slopes in from all sides, like a shallow funnel, which suits square showers and is the most common arrangement. A linear drain is a long, narrow channel, usually placed along one wall or at the entry, which lets the floor slope in a single plane toward it.
Single plane slopes are friendly to large format tile because the tile stays flat rather than being cut to follow four converging planes. They can also make a curbless entry feel cleaner. But a linear drain also needs to be matched with a floor layout, a wall to sit against and a plumbing path that works. Our comparison of linear versus center shower drains goes through the practical differences.
Drain position also interacts with where people stand. If the drain sits right at the entry, it catches water that might escape and doubles as a visual line between the bathroom and the shower. If it sits at the back wall, the entire floor tilts away from the door, which can feel natural when walking in. Neither is wrong. The point is to choose a position that suits the glass layout, the tile and the plumbing, not to follow a trend.
The grate or cover matters for daily life as well. Some are plain metal, some are designed to accept the same tile as the floor so the drain nearly vanishes. Hair catching, cleaning access and the ease of lifting the cover for maintenance all deserve a moment of thought. A drain that is beautiful but awkward to clean becomes a chore, and in a humid climate a drain that is neglected is where odors and buildup begin.
Waterproofing a floor with no curb
With a curb, the shower is a self contained basin. Without one, the waterproofing must extend farther, because the entire bathroom floor near the shower can see splashes. Many curbless designs waterproof the whole floor of the room, or at least a generous zone beyond the shower edge, so that stray water has nowhere to hide. The membrane then runs up the walls to a height set by the design.
The details are demanding. The membrane has to be continuous across the floor, around the drain, into wall corners and up past the highest point water can reach. Each seam and each penetration needs careful sealing. A membrane that is perfect across the floor but sloppy at a corner is not a membrane at all. In a warm, humid climate, hidden moisture can linger, so the system needs to be right the first time.
If you want to understand the layers and what each does, our guide to shower waterproofing explained and our broader waterproofing planning page cover it in general terms. Ask any remodeler to walk you through exactly how the floor, drain and walls are sealed in a curbless design before you agree to the plan.
Ventilation and ceiling details belong in the same conversation. A shower with no curb and a wide open entry sends steam into the whole room, so the fan, the ceiling finish and the paint all work harder. If the bathroom shares a wall with a bedroom or closet, think about where that moisture goes. Good air movement keeps the room drier and protects the finishes.
Keeping water inside: glass, splash panels and layout
Without a curb, water control comes from geometry. The slope pulls water to the drain, the shower head points away from the opening, and a fixed glass panel or a short splash wall blocks spray. Many curbless showers have a fixed panel on the side facing the shower head and an open entry on the other side, which keeps the walk in clean and the spray contained.
The size of the shower matters. A generous footprint gives water room to land and drain before it reaches the edge. In a smaller space, you may need a door or a panel that sits close to the floor. The bottom of the glass needs to meet the floor with a sealing detail that is flexible, since there is no curb to hold it. Our page on shower glass and door options explains how different styles behave.
Shower head position and spray pattern deserve thought too. A head that sprays straight at the entry will throw water outward. A rain head directly overhead is more forgiving. Handheld sprayers add flexibility but need a place to rest. These are the little decisions that make a curbless shower feel calm instead of splashy, and they are easier to settle while the plan is on paper.
A practical test is to imagine a normal shower from the entry to the drain. Where does the water from your shoulders land? Where does it run when you lean forward to rinse your hair? Where do you stand to reach the valve without getting sprayed? If the answers point to the open side, the layout needs adjusting. A thoughtful designer will sketch the spray paths with you and move the head, the valve or the panel until the room works.
Tile choices that suit a sloped, flush floor
Small tile and mosaics conform easily to the compound slopes of a center drain floor. Their many grout joints also add grip underfoot. Large format tile looks sleek, but it must be matched to a floor shape that allows it, often a single plane slope or a linear drain, because large pieces cannot bend to follow several planes.
The transition from the bathroom floor to the shower floor deserves care. In a flush design the same tile can continue across, which gives a seamless look, but then the floor needs a surface with enough traction when wet. A slightly textured finish or a smaller tile can help. Our guide to tile sizes and layouts covers how format and joints change feel and grip.
Edges and trim also come into play. Where the shower floor meets the room, the surface needs a clean finish that does not leave a sharp lip. Where the floor meets the wall, flexible sealant belongs in the corner rather than rigid grout. For more on this, read about tile edges, trim and transitions, a topic that matters even more when there is no curb to hide the junction.
Comfort, access and future use
A curbless shower is often chosen because it works for many people. A person using a mobility aid, a parent carrying a child, or anyone who simply prefers not to lift a foot all benefit from a flush entry. It is a planning choice, not a medical one, and it pairs well with a bench, a handheld shower and blocking in the walls for grab bars if they are ever needed.
That is why many homeowners consider it when they are thinking ahead. Our accessibility planning page looks at how a zero threshold fits into a larger plan. If you are comparing it with another style, a comparison of a walk in shower and a bathtub helps you weigh options for your household.
Keep in mind the other side of access. A flush floor is easier to enter, but it does not remove the need for traction, good lighting and a place to sit if you want one. Think about what the room will feel like at night, when wet, with a towel in hand. A good plan covers those moments, not only the photograph.
Lighting helps too. A shower floor that blends into the bathroom floor can be hard to read in dim light, so a bright, even fixture above and a night light along the base of the vanity make the transition clearer. Contrast in tile color between the shower zone and the rest of the room can also help people see where the wet area begins, even when there is no physical edge.
Costs of complexity and how to talk about them
A curbless shower is usually more involved than a standard shower, because of the recessed floor, the extended waterproofing and the precise slope work. We do not quote anything on this page, and the right approach is to discuss scope openly. Ask what in the floor must change, who does each part, and what could alter the plan once the old floor is opened.
Surprises are possible. Opening a floor can reveal old repairs, uneven framing or plumbing in an inconvenient place. A sound plan acknowledges that and sets out how decisions will be made if something unexpected appears. Our guide on how to talk about bathroom remodel scope helps you frame that conversation without getting lost in numbers.
If a curbless design does not fit your floor, there are alternatives. A very low curb, sometimes called a low profile threshold, keeps the entry nearly flat while keeping the structure simpler. Our page on choosing a shower pan or tiled floor covers the broader range of base options. The goal is a shower that works for your home, not one that merely matches a picture.
Starting the conversation about your shower
Begin with how you use the bathroom today. Who showers, what bothers you, whether anyone has trouble with the step, and what you wish was different. Then walk through the floor, the plumbing and the building. A remodeler who listens first will have better answers when it is time to choose a drain, a slope and a glass layout.
As the plan takes shape, confirm the main points in writing: where the floor will be recessed, how the drain is positioned, how the waterproofing extends, what tile and sealant are used at the transitions, and how the glass or screen keeps water in. Ask your city building department and your association what approvals apply to the work.
If you are considering a full bathroom project, curbless planning fits naturally within our wider walk in showers service and complete remodeling service. Call the number on this page to talk through your floor and your options. We start with a real conversation, then plan the layout, wet areas and materials, and refine selections before construction begins.
Good to know
Common questions
Can any bathroom have a curbless shower?
Not every bathroom can. It depends on whether the floor can be recessed enough for the slope and waterproofing layers. Wood framed floors, concrete slabs and condo floors each behave differently. A remodeler should inspect the floor and explain what is possible before you commit to a design.
Will water escape without a curb?
A well planned curbless shower keeps water in through floor slope, drain position, shower head direction and glass or splash panels. Poor planning can cause splashing or pooling. Ask how the slope, drain and glass work together in your layout, rather than trusting any one feature to do the whole job.
Does a curbless shower need a special drain?
Not necessarily special, but the drain must suit the floor design. Center drains slope the floor from four sides, while linear drains allow a single plane slope. Each works in a curbless design when matched with the tile and layout. Your remodeler can explain which fits your shower.
Is a curbless shower harder to waterproof?
It demands more attention, because the membrane often extends across more of the bathroom floor and must stay continuous around the drain and corners. The work is well understood when done carefully. Ask how the membrane is detailed and how the floor is protected beyond the shower area.
What if my floor cannot be lowered?
There are alternatives. A very low profile curb keeps the entry nearly flat with simpler structure, and some designs raise the surrounding floor slightly instead. Each has trade offs. A calm discussion about your floor and your priorities will show which path suits your home.
Do I need to tell my condo association?
Often yes, since floor changes can affect neighbors below and building systems. Rules vary by building and community, so ask your association and your city building department what approvals, notices or working hours apply. Do that before you settle on a design that depends on altering the floor.
Your bathroom starts with a conversation